What is Video Measurement?
In manufacturing, video measurement is optical technology producers use to check the quality of products. Industries like automotive, electronics, aerospace, medical, and military use optical metrology to improve the quality of their products by using the light spectrum and high-powered lenses to detect product flaws.
Video measurement quantifies the physical quantities and characteristics of video data streams. This process is called video verification, image quality assessment, or digital watermarking. Video measurement is quantitative and objective, requiring a numerical value and associated probability for each measured characteristic. While the video data may still be subjective, the measurements are not. A video measurement system requires an objective measurement device and methodology to function properly.
The main objective of video measurement is to determine whether or not a measured characteristic meets its image quality target value. This is typically performed as statistical analysis. If the measured characteristic falls outside its target range, the manufacturer must determine why this happened.
Industries can use video measurement systems for many purposes, such as certification and inspection, product quality control, decision support, and vendor management. Video measurement is often applied to check the quality of products such as automotive components, electronic components, and hand tools.
The Two Parts of Video Measurement
Video measurement has two major parts: metrics and reference models. Metrics perform the actual measurements, whereas reference models contain the mathematical formulae that describe how metrics perform the measurements. Video metrics measure the characteristics of a video processing system's output.
The Process of Video Measurement
• Capturing the image.
• Decomposing the image into image features.
• Segmenting the image into regions of interest.
• Analyzing the information.
• Verifying that the product meets certain quality standards.
Some video metrics are based on human perception, called perceptual metrics. Examples of perceptual characteristics include brightness, contrast ratio, color saturation, and hue. Other video metrics are based on machine vision technologies, such as area and edge detection. The primary difference between perceptual and machine vision metrics is that perceptual measurements of standard video equipment are generally linear with magnitude, whereas machine vision measurements are not.
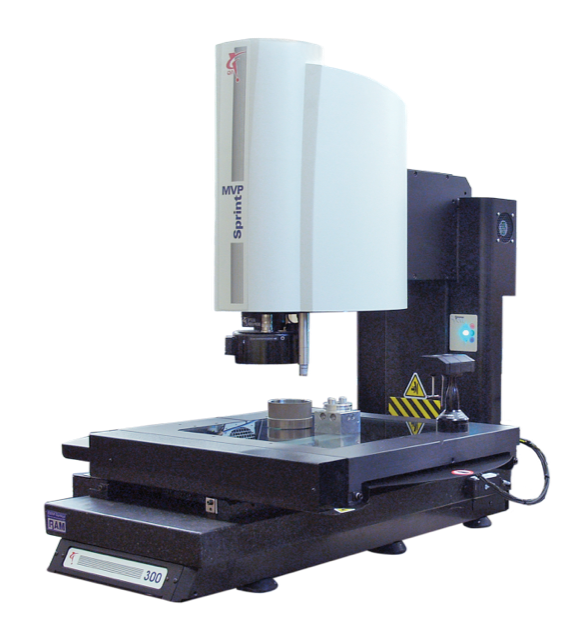
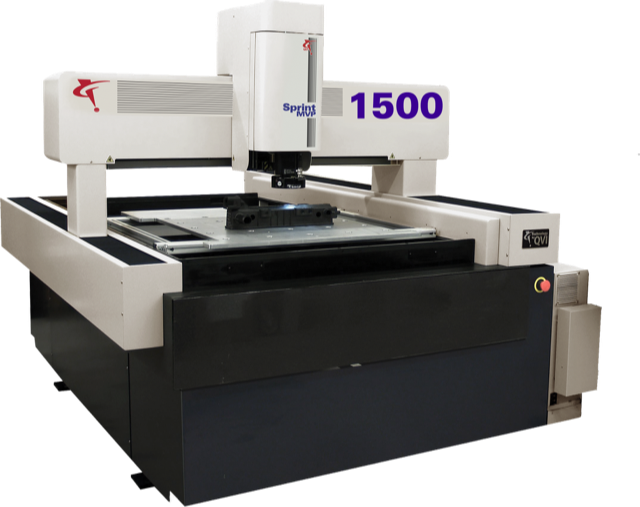
Video measuring devices offer fast, non-contact 3-axis coordinate measurement with industry-leading accuracy. This multisensory quantifying equipment can easily verify critical dimensions on first articles, production samples, or full runs.
Since its introduction, video measurement has come a long way; however, the basic concepts are still the same. The difference between today and in the past is that manufacturers have improved video measurement technology to make it more accurate, sensitive, and versatile. Furthermore, the cost of video measurement has decreased as well.

What is Video Metrology?
Metrology is the science of measurement and deals with applying precision measurement to all disciplines.Of course, there are countless measurement techniques, from simple ones like rulers to more complex techniques like radar engineering. But one area of particular interest is VMT, a discipline that studies video and vision through instruments.
VMT
Manufacturers utilize video technology to measure and verify the quality of their products, but how do they do it? Understanding VMT is a two-step process. First, there is a need to understand the principles behind VMT. Secondly, there is the need to understand the techniques used to perform video measurement in the manufacturing environment. This article will provide an overview of both aspects of metrological videography.
Video metrology (also known as VMT or metrological videography) is a multifaceted technology fast becoming the single most important application of imaging technologies in the manufacturing industry. This technology facilitates the process of quality control to reduce or eliminate product variability. VMT works by quantifying a product's optical and electronic signals to verify its quality. By using video technology, manufacturers can collect and analyze data from the environment, and by doing so, they can determine whether or not a product is up to standard. VMT also includes techniques that facilitate and improve the process of measurements, such as image segmentation and self-reference.
VMT is widely used in several medical, aerospace, automotive, and electronics industries. The VMT process involves six main steps: capture, decomposition, segmentation, analysis, monitoring, and verification.
Capture
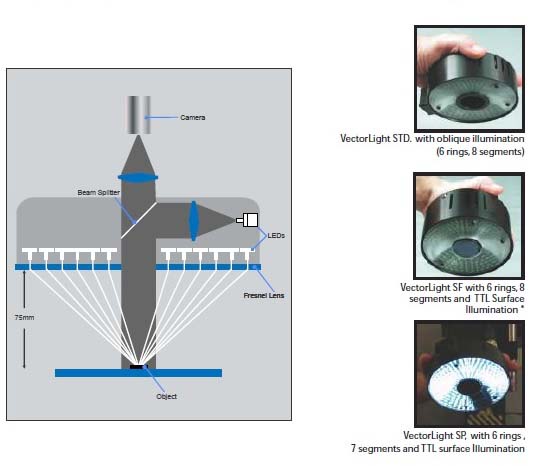
Metrological videography uses video cameras to capture a product or component. This may be performed by using a camera with a high frame rate, which captures images at over 50 frames per second. The camera may also capture images in both color and black and white.
Decomposition
When capturing a video of a product, the video needs to be decomposed into smaller, more manageable, and useful images. Decomposition is done to investigate specific parts of the video footage, and decomposition may be performed using an optical or computerized method.
Segmentation
Segmentation involves splitting an image into smaller, more manageable regions. Segmentation is useful for manufacturers performing VMT on a specific part of the image.
Analysis
The analysis part of VMT is performed by analyzing the video information. The analysis will include:
• Identifying the location and distance of different features in the image.
• Quantifying and comparing the values to expected values.
• Extracting numerical data from images.
Various tools and techniques, such as computerized edge detection and optical flow, are also used to analyze video images.
Monitoring
The monitoring step involves monitoring the product's performance while it is being measured. The monitoring step is often considered the most important part of VMT because it is where quality control is done.
Verification
The verification step involves comparing the measured results of a product to its required specifications. If the results comply, then the product is considered verified. This step is part of quality assurance, verifying that a product meets certain requirements or specifications.

The History of Measuring
The history of measuring dates back to the beginning of human existence. Aristotle wrote a treatise on metrology around 340 BC. During this time, one of the metrology's main objectives was to standardize weights and measures. By the 16th century, metrology began to designate the standards and measurements used in conjunction with industrial production.
In the early 17th century, Galileo Galilei, considered by some to be the father of modern physics and astronomy, was an advocate of the use of metrology in industry. In his published works on mechanics, he mentions the need to improve the measurement of weights and measures.
The industrial revolution, often called "The Great Awakening," started in the 1700s with John Kay's invention of the flying shuttle for weaving. The 19th century saw the development of several metrology techniques and instruments. The early part of the 1800s was dominated by quantifying systems such as the slide rule and micrometers used to measure precise geometric dimensions.
Industry leaders in video measuring technology have been pursuing the possibilities of light for more than 100 years. It all began with the production of precision optical glass, and the glass was used to manufacture lenses for microscopes and telescopes. Since this departure in 1917, there has been significant growth in light use in several key industries. The development of light-based measurement techniques has significantly impacted these industries and continues to do so today. The decades following the inception of this new technique saw the introduction of polarizing and stereo microscopes, further enhancing the use of light in industrial quality control. The 1990s saw the development of new instruments and techniques, such as the Eclipse range of infinity optics.At the turn of the millennium, the industry giant Nikon unveiled digital imaging solutions like microscopy, further enhancing light's use in industrial quality control.
Nikon has diversified its portfolio with 3-D imaging products. The continuous innovations in this market give industry leaders the flexibility to meet growing market demand. 3-D imaging has given the industry a new measurement means, improving overall quality control.

Types of Video Measuring Systems and Techniques
VMT's objective is to measure and assess a product's quality systematically. VMT is crucial for many industries.
With today's technology, there are many ways of assessing the quality or performance of a component or product. Often, the assessment of a product entails two elements; part geometry and performance. Performance is typically measured by determining if a product meets or exceeds its requirements.
CNC Video Measurement
CNC video measurement systems can be used to assess the geometry of a product. If a product is manufactured with errors, it is important to eliminate or correct these errors before performing any quantifying operations. If there are no errors in the part geometry, it is important to ensure that the product's performance meets or exceeds its specifications.
Automated Precision Measurement
Automated Precision Measurement systems are metrological videography systems that allow for the measurement of complex geometries. Automated precision measurement systems are typically used for inspecting and verifying intricate parts.
The Manual Field of View System
This is also used to measure a product's performance and geometry using manual methods. With manual measurement systems, it is possible to use a handheld magnifying glass or loupe device. Manual systems are commonly used when only a gross measurement of the part is required.
Measurement By Parts
Measurement by parts inspection (MBP) is a non-destructive method where a component is assessed to see if it meets the specified requirements. Measurement by parts inspection combines visual inspection with measurement data. This is done by taking a video still frame of the component or product where the measurement data is recorded. These video still frames are then digitally analyzed and compared to the required specification. The difference between the two may then be used to determine if there is an inconsistency.
Minute Part Measurement
Minute Part Measurement is used by automotive, medical, and transportation industries to determine how fast a component or product moves. This is done using the mechanical measurements of speed and distance, and mechanical measurement can be done with a linear CMM, an optical quantifying system, or both. Minute part measurement is used to determine if there is a variation in speed or distance, which is important when estimating parts under varying conditions or for different tasks.
Time of Flight
Time-of-Flight (ToF) is a technique used to determine distance using light. The typical application of ToF is a 3-D imaging technique where the distance between two points is determined. The two points in question may be analyzed for geometric purposes or to determine if the part is out-of-tolerance.
Interferometry
Interferometry is an optical measurement technique to determine the distance between two points. The distance between the two points is measured in millimeters, and angular velocity is used to calculate the distance between the two points.
Conclusion
These are only some types of metrology systems used in metrological videography. It is imperative to use the right technique for the right application. With the introduction of technologies, there has been a significant impact on industry leaders and those looking to enter the field of quality control.The end goal of any VMT process is to ensure that a product is consistently manufactured and meets or exceeds its specifications, and this is where the value of VMT lies.


