What is a Coordinate Measuring Machine?
In traditional settings, quality control checks were done to ensure that equipment was in proper working order. Professionals in corporate settings used gages and calipers to measure each piece, along with its parts and components. The process was long and arduous, and could be inefficient at times.
Coordinate measuring machines are programmed through a computer system to measure various parts, where they record each piece using a series of beeps. Once all measurements are complete, the computer recreates a 3D image on a screen, where all points are located and plotted for precision. A comparison is noted between where the points are and where they should be. Manufacturers can decide what needs to be corrected before using a part.
Coordinate measuring machines are used to calculate the dimensions and geometries of physical objects. Probing systems are employed to ascertain specific points on an object's exterior. CMMs check the dimensions of objects and their parts in a well-organized and efficient way with this technology. In fact, most CMMs are capable of assessing the dimensions of objects and parts at an average rate that's 10 times faster than older methods. This enables major companies more time to focus on other critical tasks while saving on labor costs.
Coordinate processing technology is used by CMMs to measure the depth, width, and length of a gadget. There are two types of methods for measuring the dimensions of an object. One is the touch probe method, which ascertains an object's precise dimensions through touch. Another method, known as the contactless method, contains digital cameras or laser scanners that determine the exact proportions of items. These CMMs can be used to measure larger items as well.

Different Types of Coordinate Measuring Machines
There are five different types of coordinate measuring machines used for taking precise dimensions of objects.
Bridge
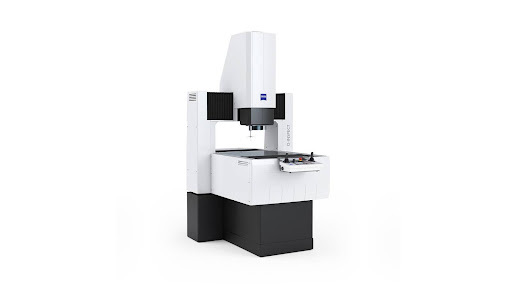
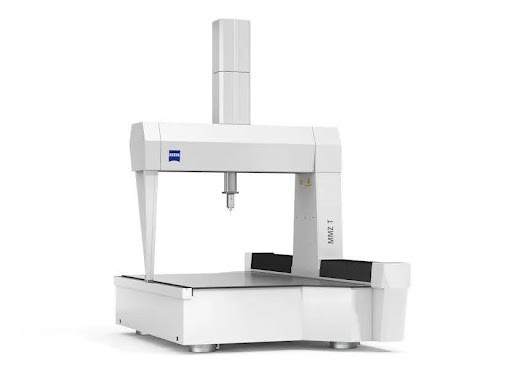
The most widely used CMM is the bridge type, which is known for precise measurements of small to mid-sized parts. There are two varieties of a bridge: one that remains in place and one that is mobile. A mobile bridge CMM can be wheeled around a shop or a factory floor and taken somewhere to be inspected and fixed. Another feature of the bridge style CMM is its flexibility across a variety of industries. The device is popular among those who work in the aerospace, automotive, and energy industries. Due to its efficiency in evaluating object dimensions, it can even measure materials that help create objects, such as plastic, glass, and sheet metal.
Gantry
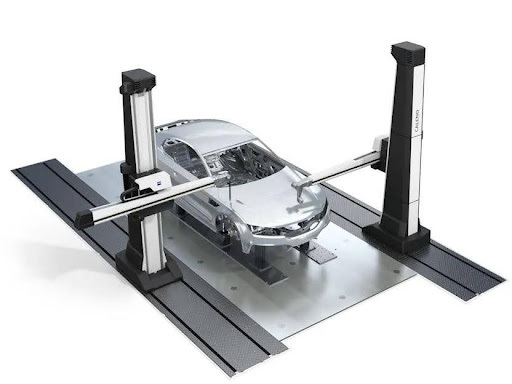
Anyone who works with large parts may be familiar with gantry CMMs. These archetypes are best used within the automotive industry because they are prized for their ability to lift massive equipment onto a surface and measure it with precision. This eliminates any worries about lifting large objects such as vehicles or their engines, which are burdensome to manufacturers. This speeds up production because the gantry can do two things at once. Once an accurate dimensional measurement is recorded, the rest of the process can be completed in time.
Cantilever
Although restricted to measuring small parts, the cantilever has an edge over other CMM types. Its one-point system allows it the optimal flexibility needed to measure objects and parts from three different sides. The only drawback is that this particular CMM is that it must be firmly secured to a flat surface such as a wall, where it can stretch horizontally to measure any gadget. The most common use for cantilevers is in construction, where they're used to measure parts of buildings and structures. The only downsides are their lack of portability, because they must be moved to the location of the object they're measuring. Those planning to use this type of CMM may need to hire a professional because these types are hard to set up and operate.
Horizontal Arm
Horizontal arms are named as such for a specific reason. These CMMs are mounted horizontally so that they can take the dimensions of long, slender objects. Examples include sheet metals and other objects that are difficult to assess with other CMM types.
There are two distinct types of horizontal arm CMMs: the plate-mounted and the runway-mounted version. The plate-mounted type is secured on a large surface plate and can be side mounted or top mounted for an accurate measure. The runway version operates on a secured beam without a structural plate. It's typically top-mounted with a dual arm that measures both sides of an object concurrently.
The horizontal arm CMM is quick and simple to install. The piece itself requires less ceiling height for making precise measurements. There is less of a footprint, which means the horizontal arm is environmentally friendly. Plus, it's one of the cheaper alternatives in measuring gadgets.
However, there are some slight issues with the horizontal arm CMM. It's not as accurate in calculating the height, width, and depth of objects. Plus, it cannot be transported from place to place. Anything that needs measuring must be brought straight to the horizontal arm CMM. Manual assembly is required, and it can only be used in a metrology lab due to low vibration tolerance.
Optical
The optical CMM is portable, lightweight, and requires no contact during measurements. They scan and assess dimensions of gadgets and parts using triangulation, where specific points and lines are used. In some cases, light patterns are used to gauge the length, width, and depth of each item. Thanks to state-of-the-art image processing technology, every image is scanned and its dimensions are calculated with optimal speed and efficiency.
The good news is that optical CMMs have an extended measurement volume and can probe and scan for greater precision. Their processing speed is excellent, which helps make production run smoother. It's easy to use because there are no manual setups and no programming is required. The only downfall is that an application may be required prior to use.

Types of Measures
Coordinate measuring machines use different measurements to ensure that the dimensions of gadgets and parts are thoroughly assessed with accuracy and efficiency. These methods include:
- Dimensional: This refers to an object's complete dimensions. This includes the height, width, and length of any piece.
- Profile: Here, the Coordinate measuring machine uses a 3D scan to compare the dimensional measurements of an object that's usually drawn.
- Angularity: Probing is one of the most commonly used methods in angularity measurements. However, manufacturers and testers can use other means, such as an indicator or a sensor, to get an idea of the size and volume of something.
- Depth Mapping: Using 3D imaging, depth maps gather information about gadgets to get a clearer picture of their volume and size. Distance is calculated by assigning a value to each pixel as a starting point.
- Digitized Imaging: Digital imaging is an impression of the physical characteristics of any object, external and internal. This helps companies get a better idea of the size and dimensions of gadgets and parts.
- Shaft: Shaft measurements use a plethora of metrology tools designed to make accurate measurements of objects. These tools include handheld CMMs and high-end coordinate measuring machines. They have splines, tapers, grooves, threads, cams, and gears. These parts enable shafts to measure dimensions from every angle, including the diameter, angle, and distance between lines or points.
What Are The Parts of a Coordinate Measuring Machine?
CMMs have several distinct elements:
- Structure
- Probe
- Controller
- Software
Each works in tandem to help CMMs to quantify the dimensions of gadgets and parts. The structure refers to the layout and make of the CMM. This includes the type of material the device is made of. Most CMMs today are made of granite, aluminum alloy, or composite materials. In most cases, ceramic is applied to the Z axis of a machine to ensure that it remains steady and in place for object scanning.
The probe, or probes, refer to the elements of a CMM responsible for making direct and comparative measurements on objects and parts. They use laser triangulation, capacitive, and video imaging through sensor technology to ascertain quantitative data on objects. There are two kinds of probes: touch-trigger and displacement measuring probes.
Touch-trigger probes have special technology that allows manufacturers to take measurements of objects using a stylus. The ball at the end of the stylus touches a specific point. From there, the probe moves on to the desired point, where it emits a signal that announces its arrival. The probe then makes a calculation on the dimensions of the thing its supposed to measure.
Displacement measuring probes use sensors to measure the height, width, and density of items. However, these probe types can do so while identifying fluctuations, otherwise known as displacements, in an object's dimensions. It does so by taking stock of the current position and dimensions of each entity while extracting quantitative data.
Controllers regulate the results of machine measurements. They're used in situations involving mass production of parts through a programmed system. In other cases, controllers can perform the same duties through a manual system using a computer.
Software is the intrinsic part of a quantifying system that collects all data from CMMs. Once it collects the data, the software then analyzes it and displays all results in real-time. Otherwise known as metrology software, it detects any deviations in the data so that the object can be sent back for another measurement.

Conclusion: Using a Coordinate Measuring Machine
With proper training, most CMMs can be simple to use. The greatest challenge is setting them up, which takes a lot of technical knowledge and mechanical skills. Once setup is complete, it's vital to run a thorough check to ensure that everything is in working order. It's best to hire a professional for these initial steps to ensure accuracy and efficiency.
Assessing an object's dimensions begins with a probe, which starts at a specific point and ends at the right spot. The CMM can take an accurate analysis of the object in question. But the probe must first be rightfully calibrated to ensure accuracy and reliability. All objects being measured should be stored at room temperature for a specified time period to ensure precision prior to being measured. Even the slightest change in temperature can offset an object's dimensions and cause issues in manufacturing and production. Each piece is compared and analyzed against a target object. Some common target objects chosen include:
- End Bar
- Ball and Cone
- Hole Plate
- Ball Plate
Higher calibers may require more light to collect size and volume. This is known as laser interferometer, and it is a method that is employed to make measurements with accuracy. But in most cases, a CMM may make normal assessments of an object's height, width, and depth.
Determining precise mensurations of objects and their parts takes time and care. Knowing the correct CMM type is important when it comes to a part's size and capacity. This ensures best practices for optimal results.


